
Whether you’re a professional graphic designer, amateur photographer, web designer or you simply like to doodle rock-n-roll rodents or spaced out super heroes in your spare time, Adobe Photoshop is an awesome program that is great for business and personal use. The thought of learning a new application like Photoshop may seem a bit daunting at first thought. And although Adobe Photoshop has extensive capabilities, it can be much easier to learn than you think.
Some Popular uses of Adobe Photoshop are:
-Photo Color Correction
-Photo Retouching
-Superimposing Images
-Designing Website Layouts
-Designing Logos
-Digital Fine Art/Paintings
What is Photoshop?
Adobe Photoshop is an imaging and graphic design software application. It is widely utilized for photo editing but is also used for designing websites, graphics, logos, editing videos, and creating 2D and 3D artwork. In the professional graphic design industry, it is considered an integral tool. As a graphic designer/art director, Photoshop is a “must-have” application for me. I use the program on a daily basis and would be lost without it.
Let’s start off with some beginner’s tips on brightening up an image.
How to quickly brighten a dull photo with the Curves and Saturation tools in Adobe Photoshop
The following is just one way to perform a simple color correction using Adobe Photoshop. First, open the Photoshop application. Locate the image file you want to adjust in your browser and open the image (File>Open) (Fig. 1). Under file, go to “Save As” and rename your file. Doing so will leave your original image untouched. Once you’ve opened your photo, open the Curves dialog box in the file menu. (Image > Adjustments > Curves) (Fig. 2).
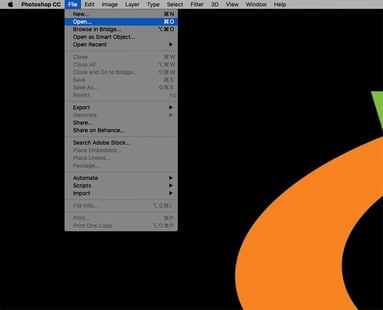
Fig. 1 |
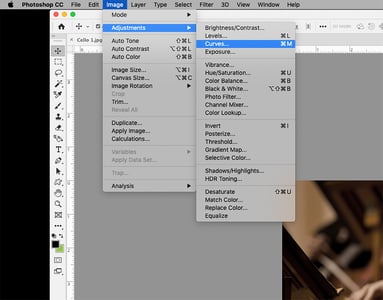
Fig. 2 |
Once the Curves dialog box opens, Click the Preview option so you can see how your image changes while adjusting the tones. Place your cursor in the center of the grid. Hold down the mouse button and drag the curve line to adjust a tonal area. Dragging the points up or down will allow you to darken or lighten the tones. Dragging to the right or left will allow you to adjust the contrast of your image. In this instance, we will be making a simple adjustment stemming from the mid-tones. Place the cursor in the center of the curves grid.
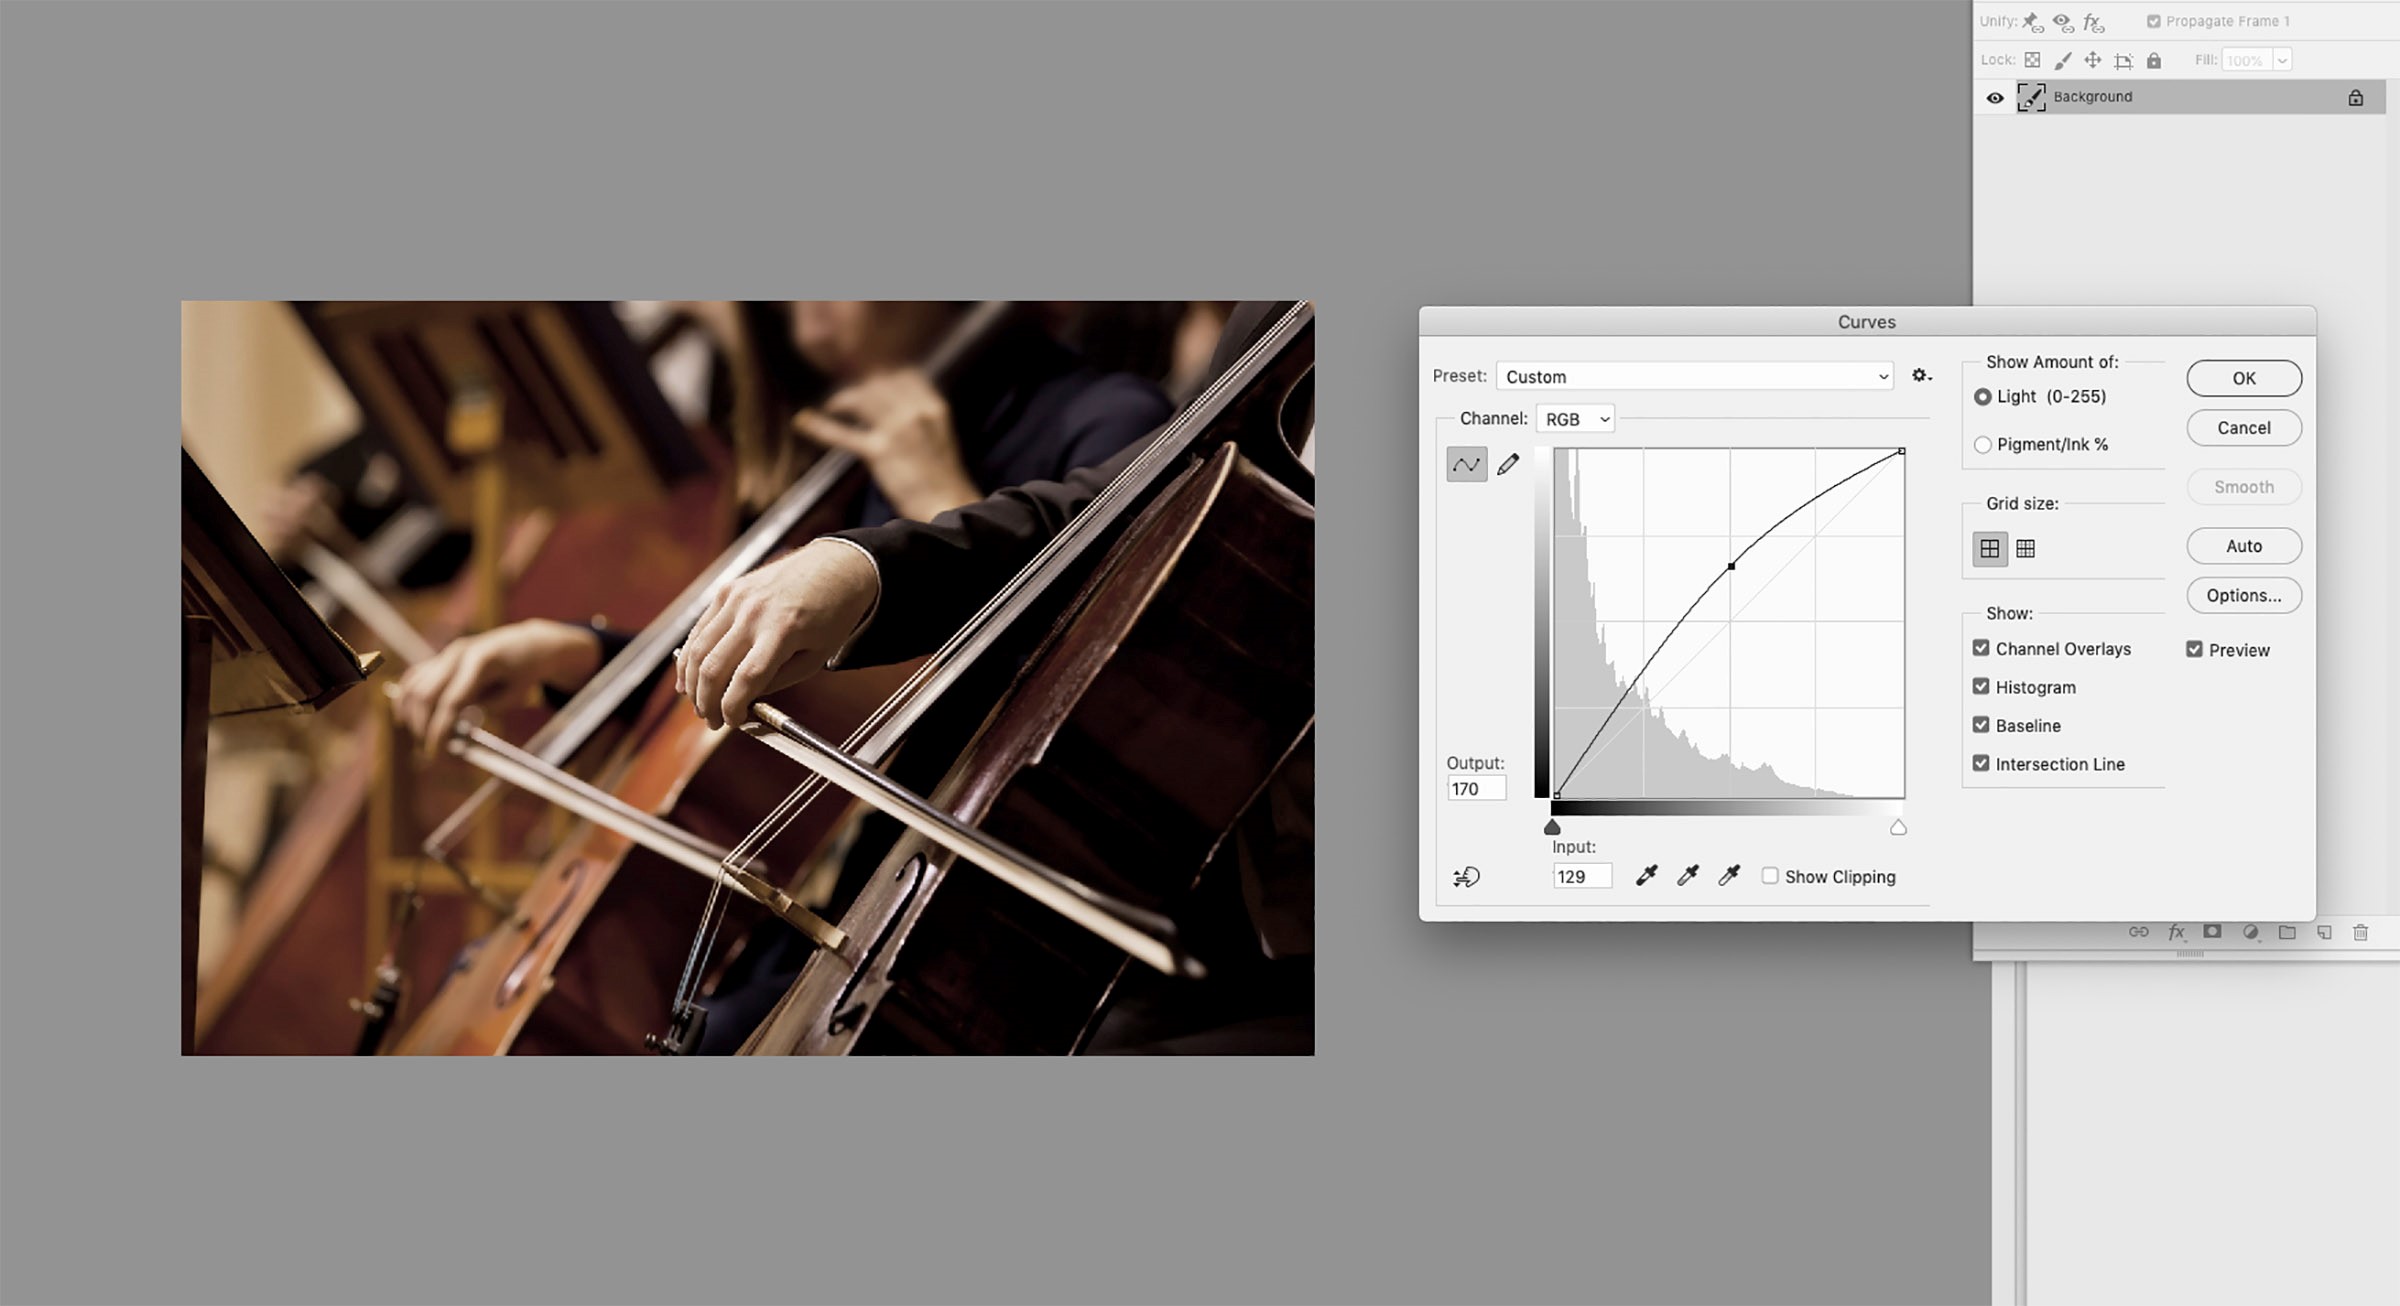
Fig. 3 |
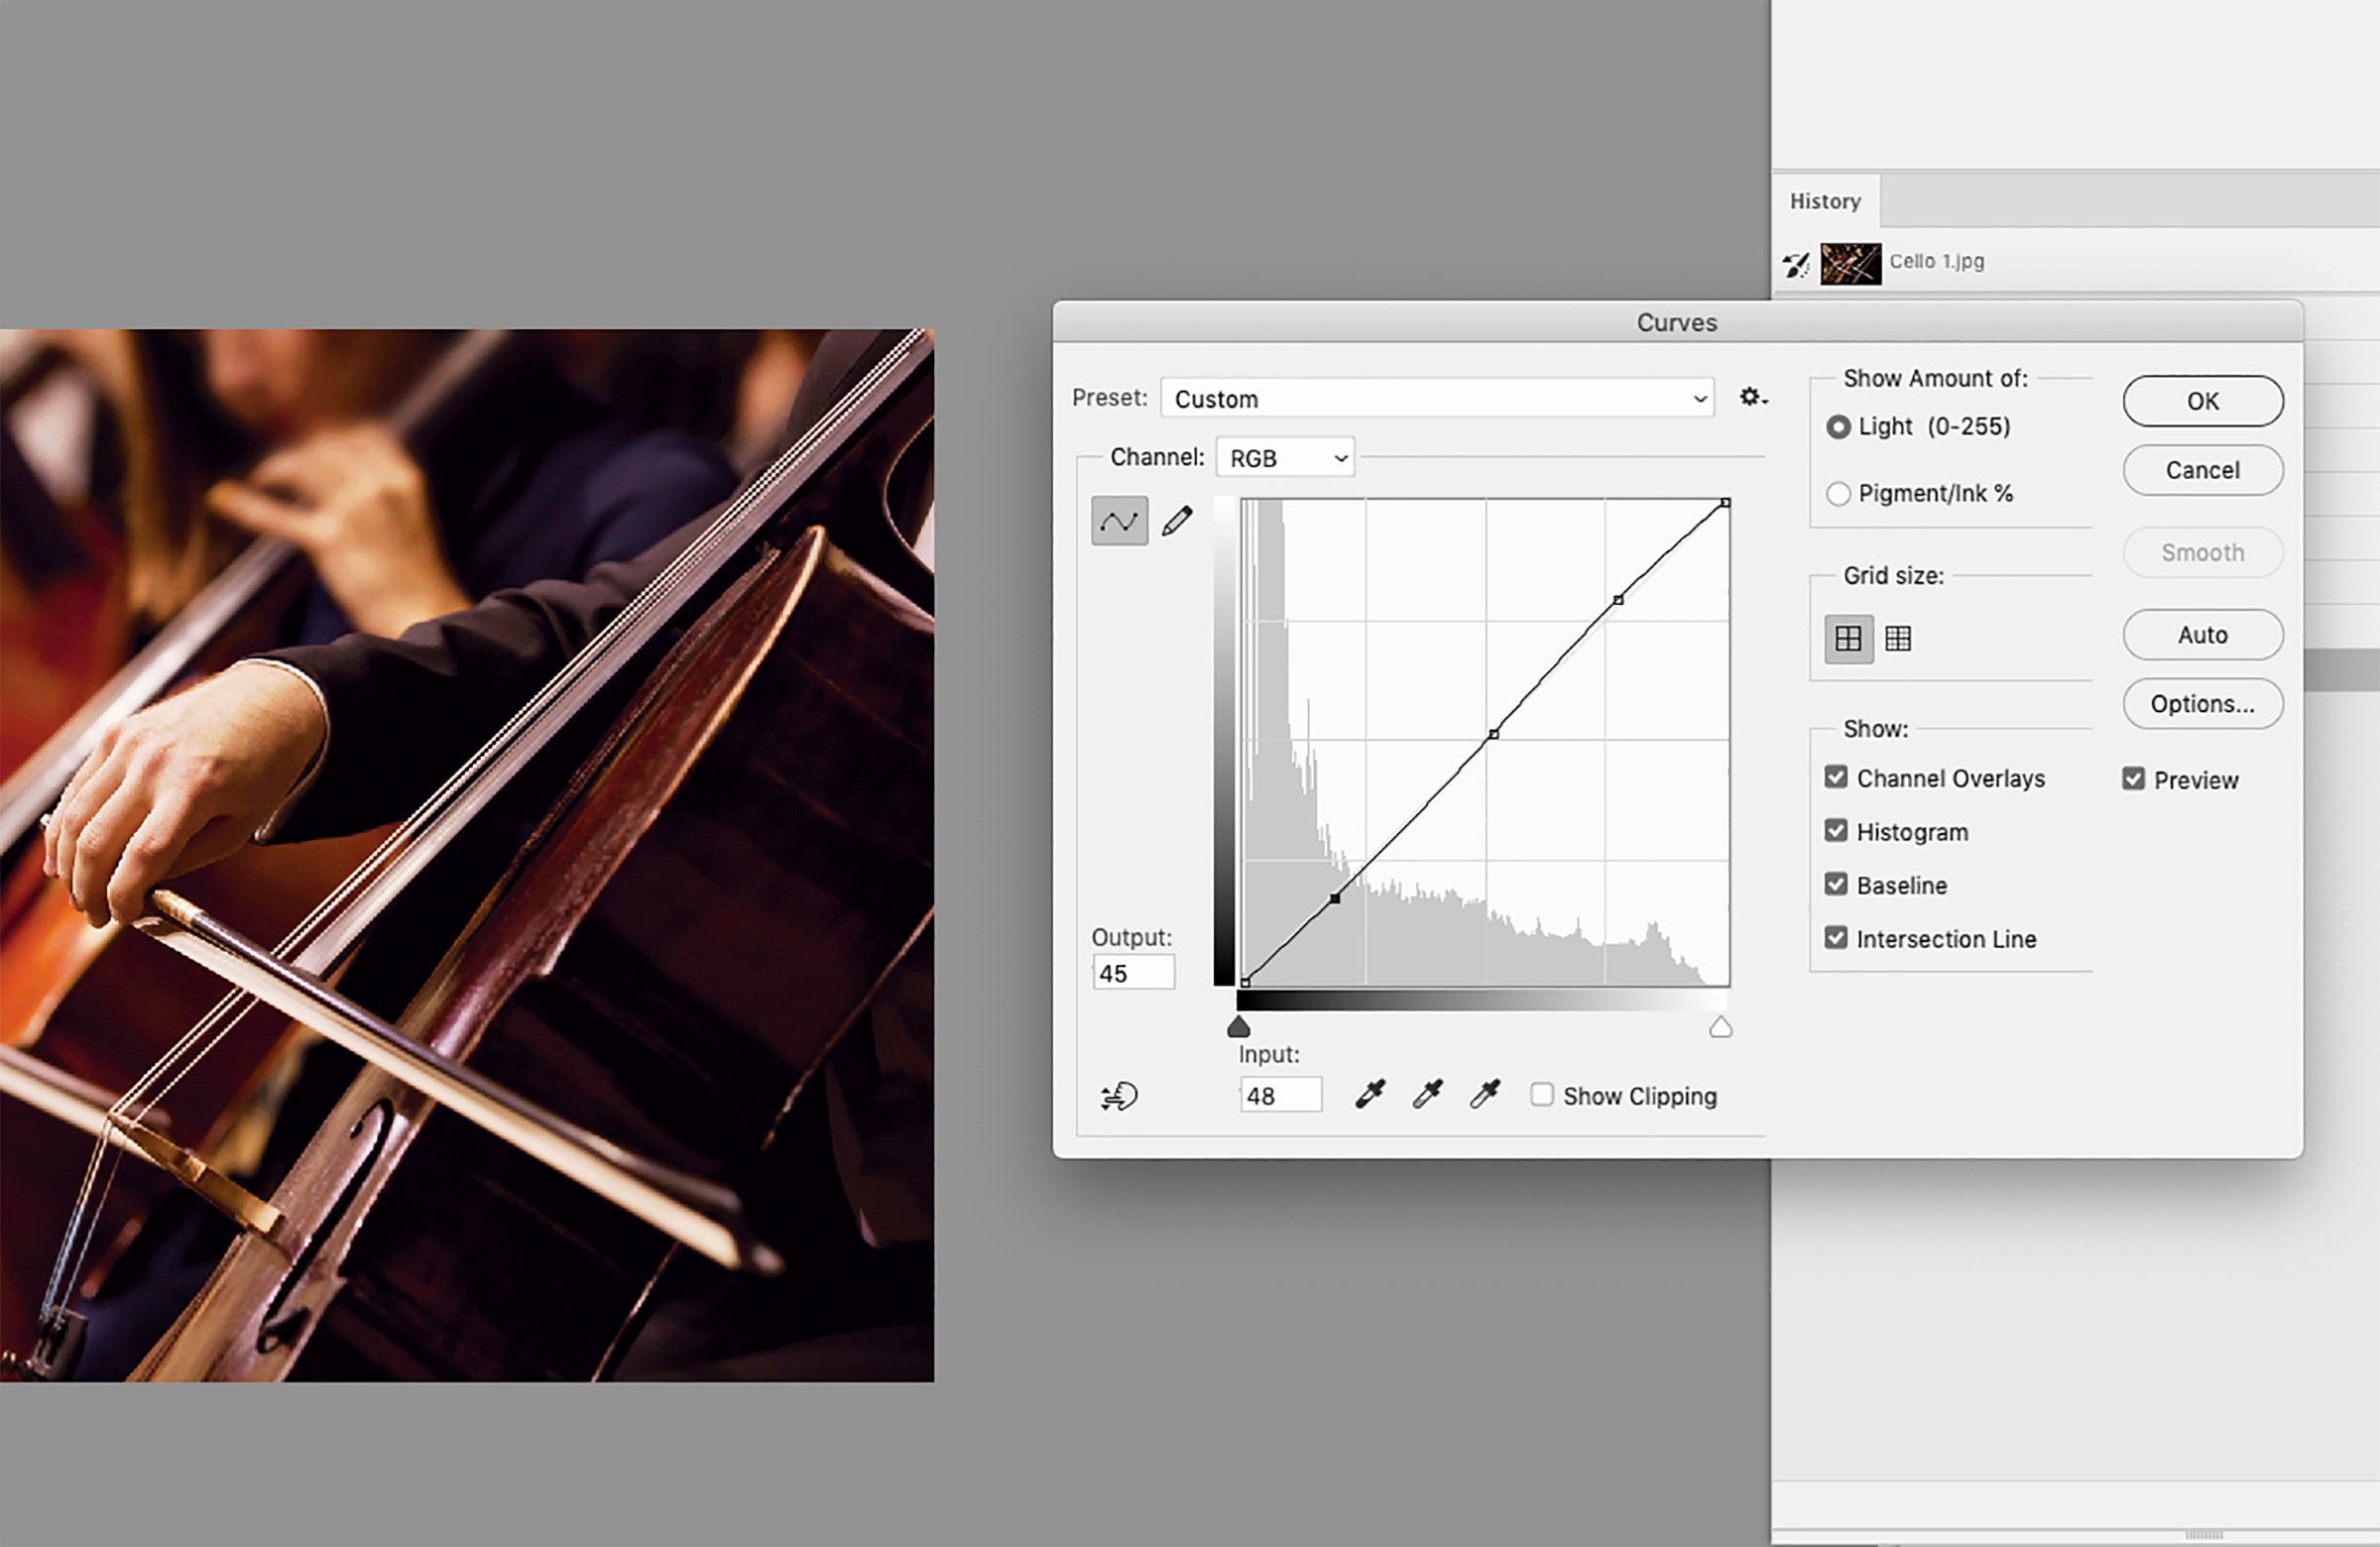
Fig. 4 |
Drag the curves line up until you reach the desired tone you’re looking for (Fig.3). Feel free to experiment with the Curves line by dragging in different directions and adding points (Fig. 4). You can add several points to the curve (up to 14). Points on the curve will remain anchored until you move them. Doing so will allow you to adjust tone in one area without affecting others. To undo your adjustment, simply press the alt/option key and select “Reset” in the curves dialog box. Your image will revert to its original state and you can try again until you achieve your desired results. If you’re in a pinch, for a super quick fix, simply open your image, open the curves dialog box and click “Auto”. This will automatically adjust your image using the Photoshop default settings. I don’t highly recommend this. However, it can work if you simply need a quick adjustment and your friendly neighborhood designer/Photoshop guru is unavailable. Depending on the image, results may vary when using this particular option. Once you’ve reached your desired tonal results with the Curves adjustment, click “OK”.
Adjusting Color Saturation
Once you have adjusted your tones with the Curves tool, navigate to the File menu and open the Hue/Saturation dialog box. (Image > Adjustments > Hue/Saturation). While remaining in “Master” mode, drag the Saturation slider to the right. This will increase the color saturation over all color channels (Fig 5). Dragging to the left, will decrease the saturation. You can also adjust individual color channels by clicking on the “Master” drop down in the Hue/Saturation dialog box (Fig 6). This option would typically be utilized by advanced users but feel free to experiment. You can always revert the image to it’s original state by pressing the Alt/Option key and clicking reset.
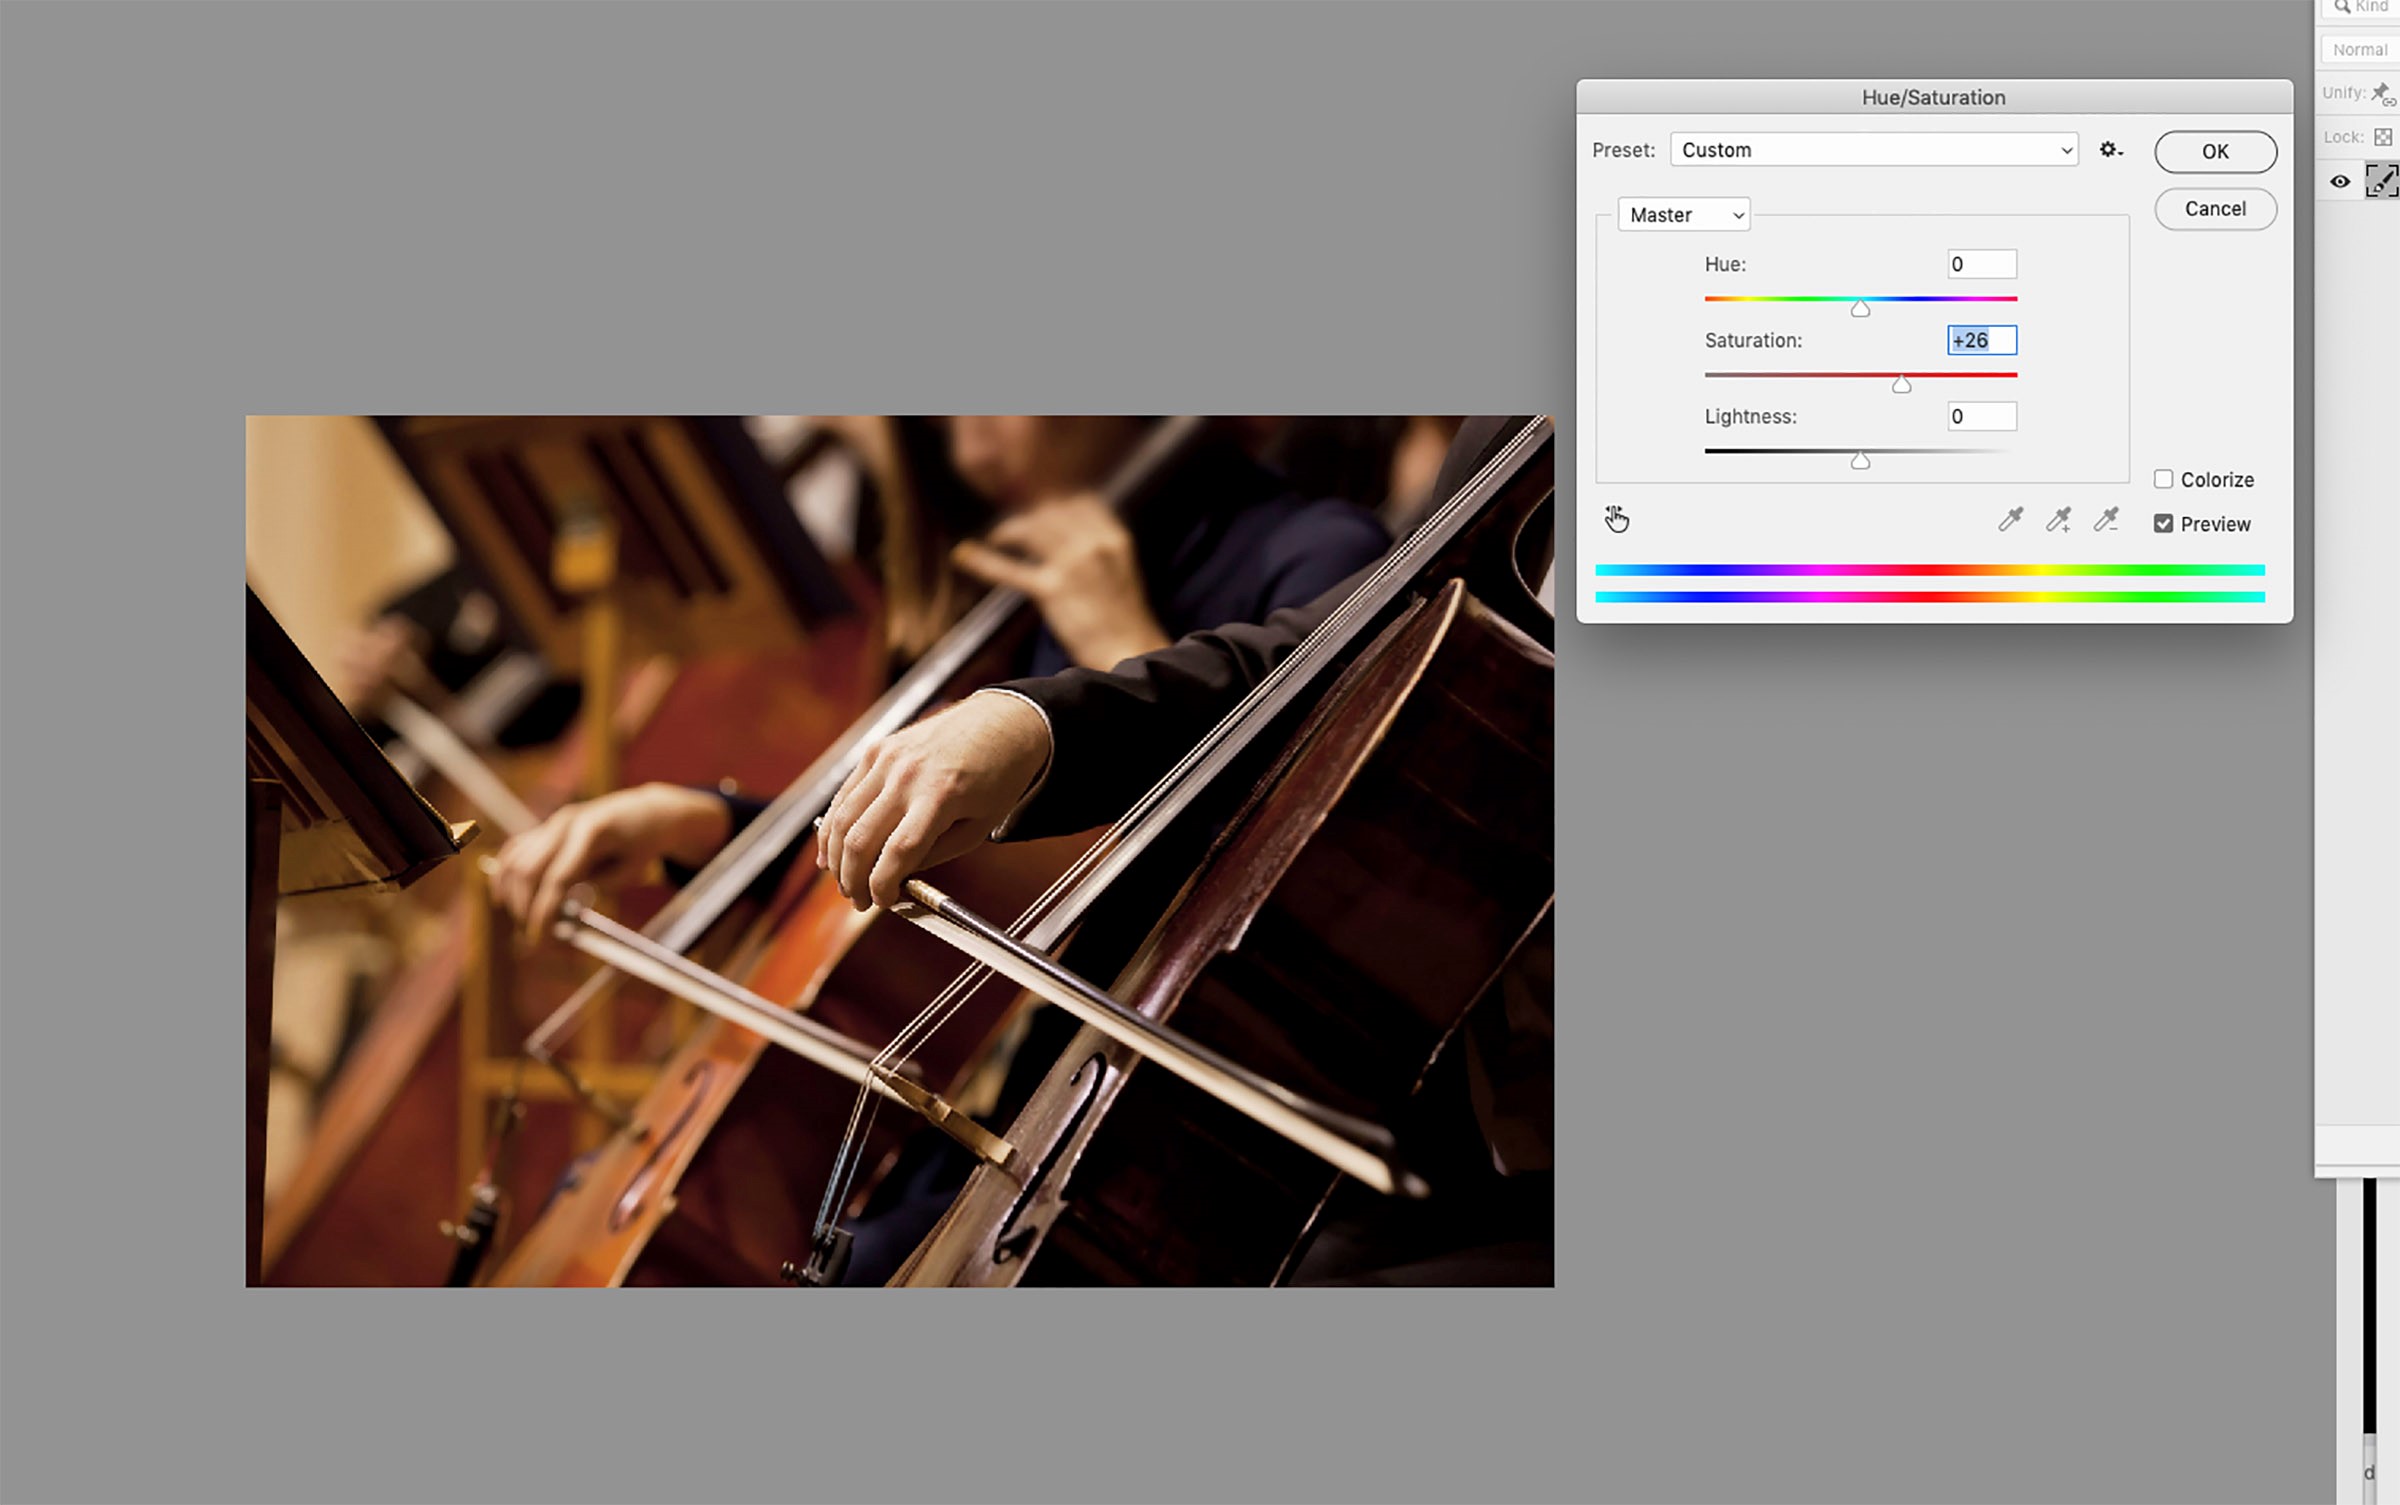
Fig. 5 |
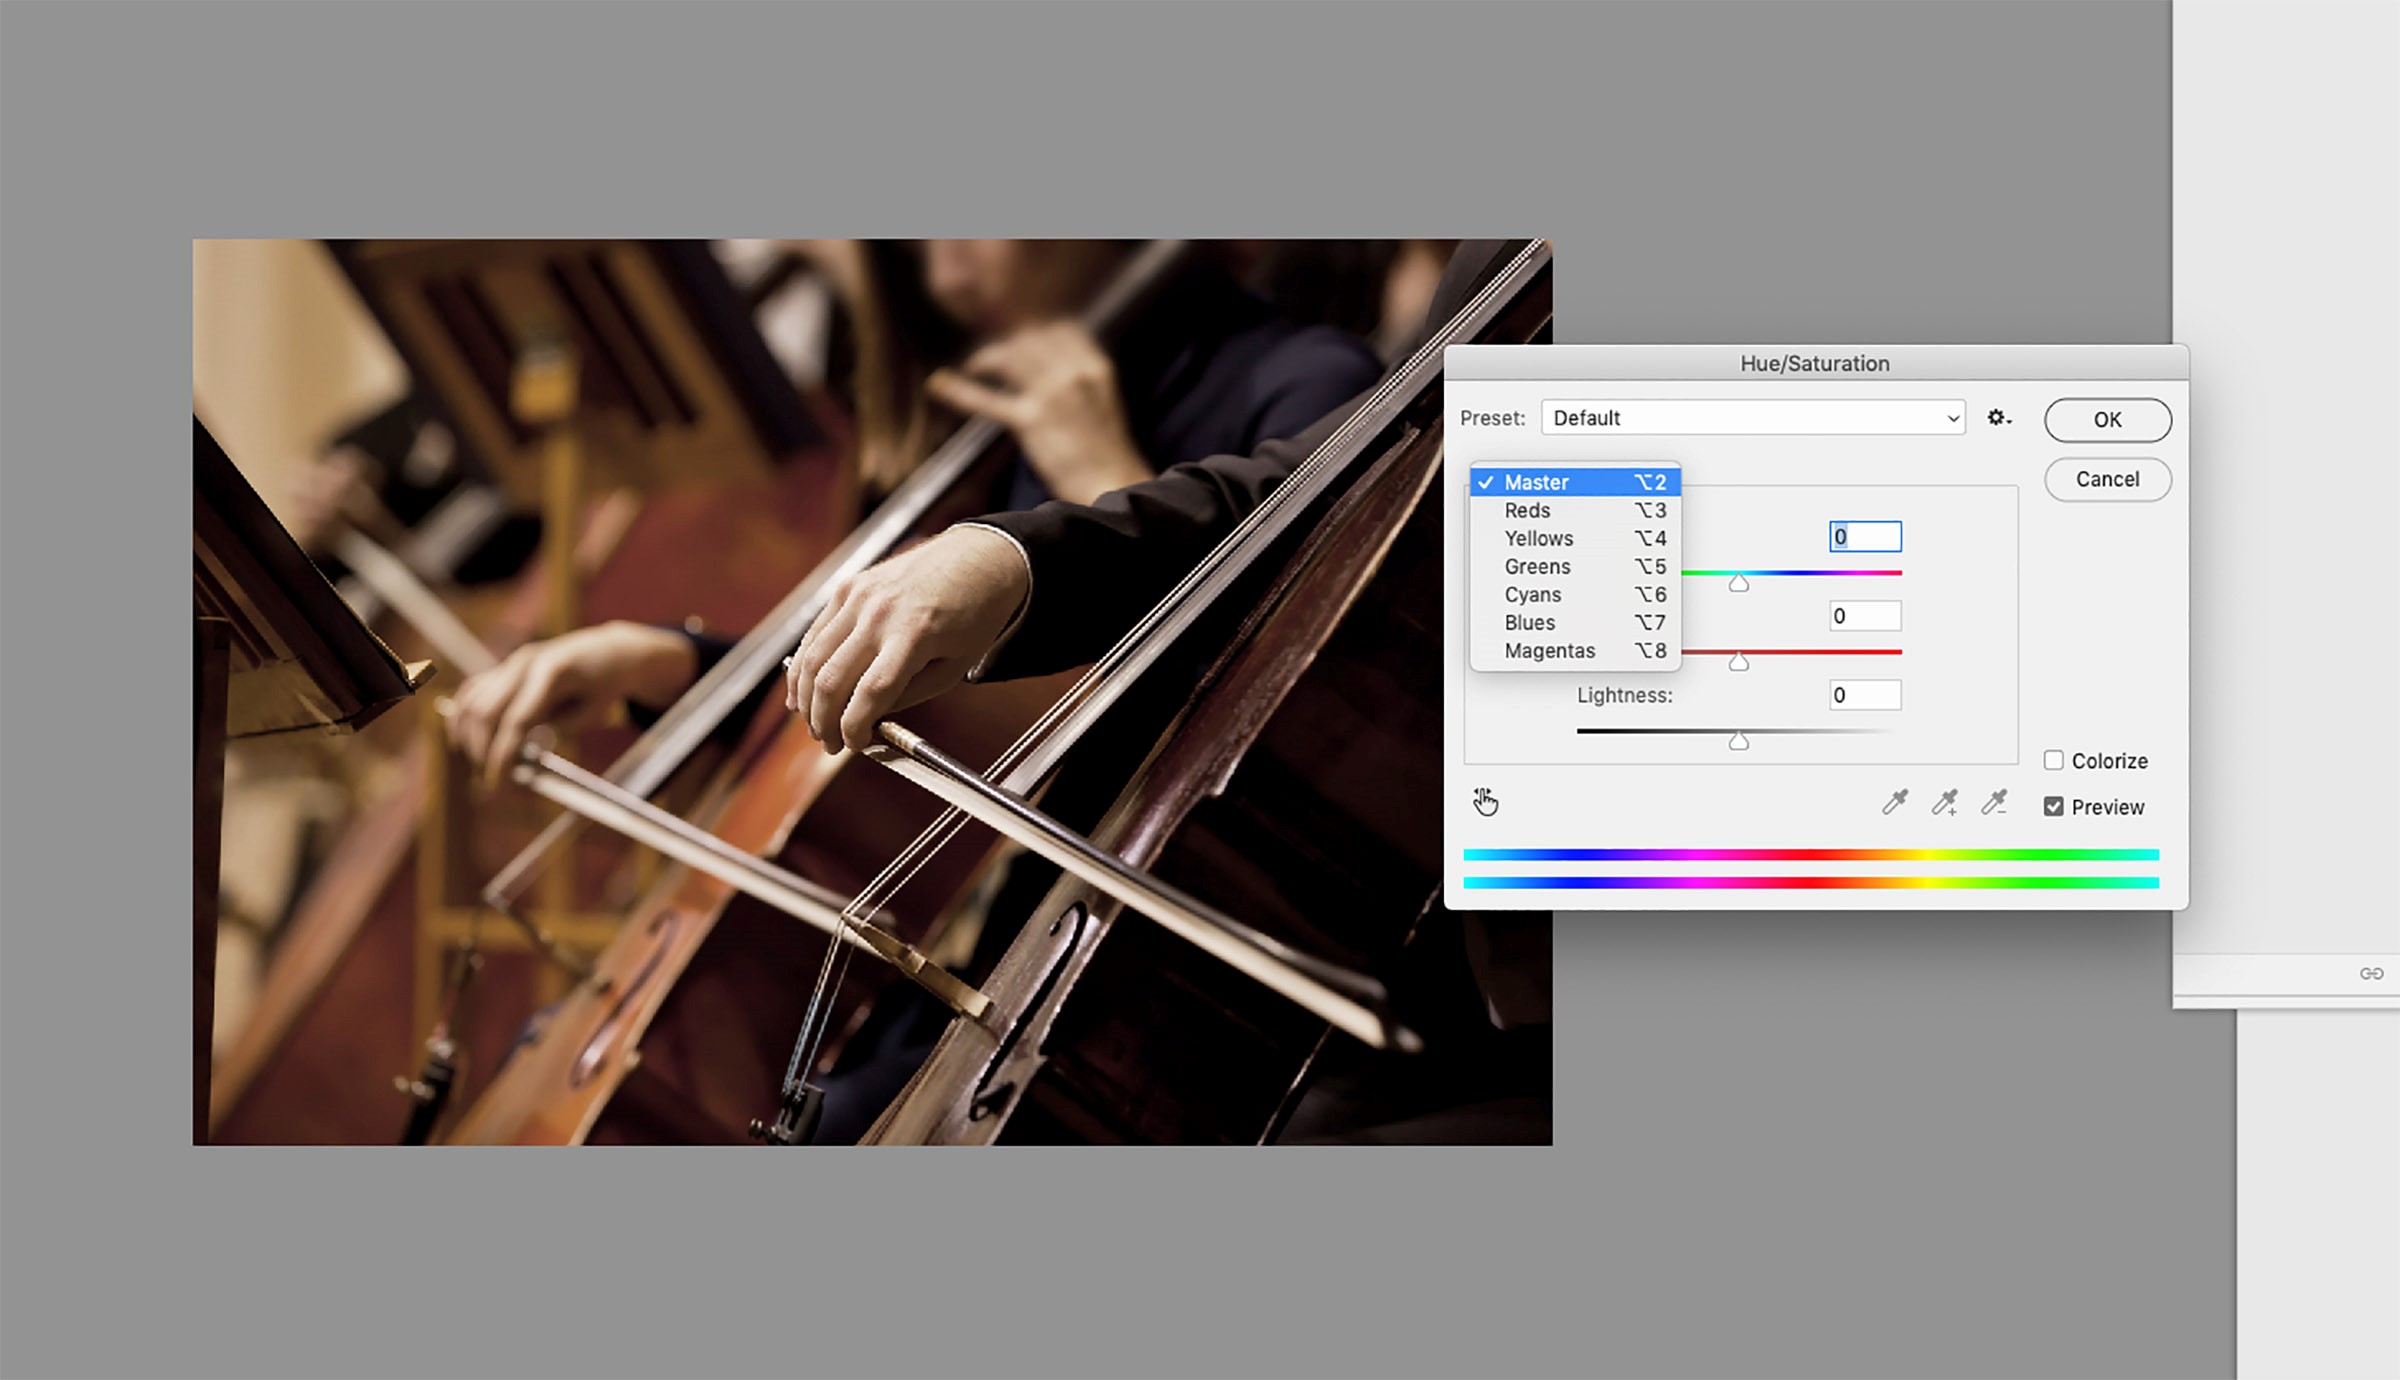
Fig. 6 |
Once you’ve achieved your desired results, save your new file. If you’re saving for print, convert the file to CMYK (Image > Mode > CMYK) (Fig.7) and save the file at 300 dpi. (Fig.8) as JPEG or TIF formats (File > Save As). If the image is going to be used digitally, you’ll want to convert the file to RGB mode
(Image > Mode > RGB) and in JPEG or PNG formats at 72 dpi.

Fig. 7 |
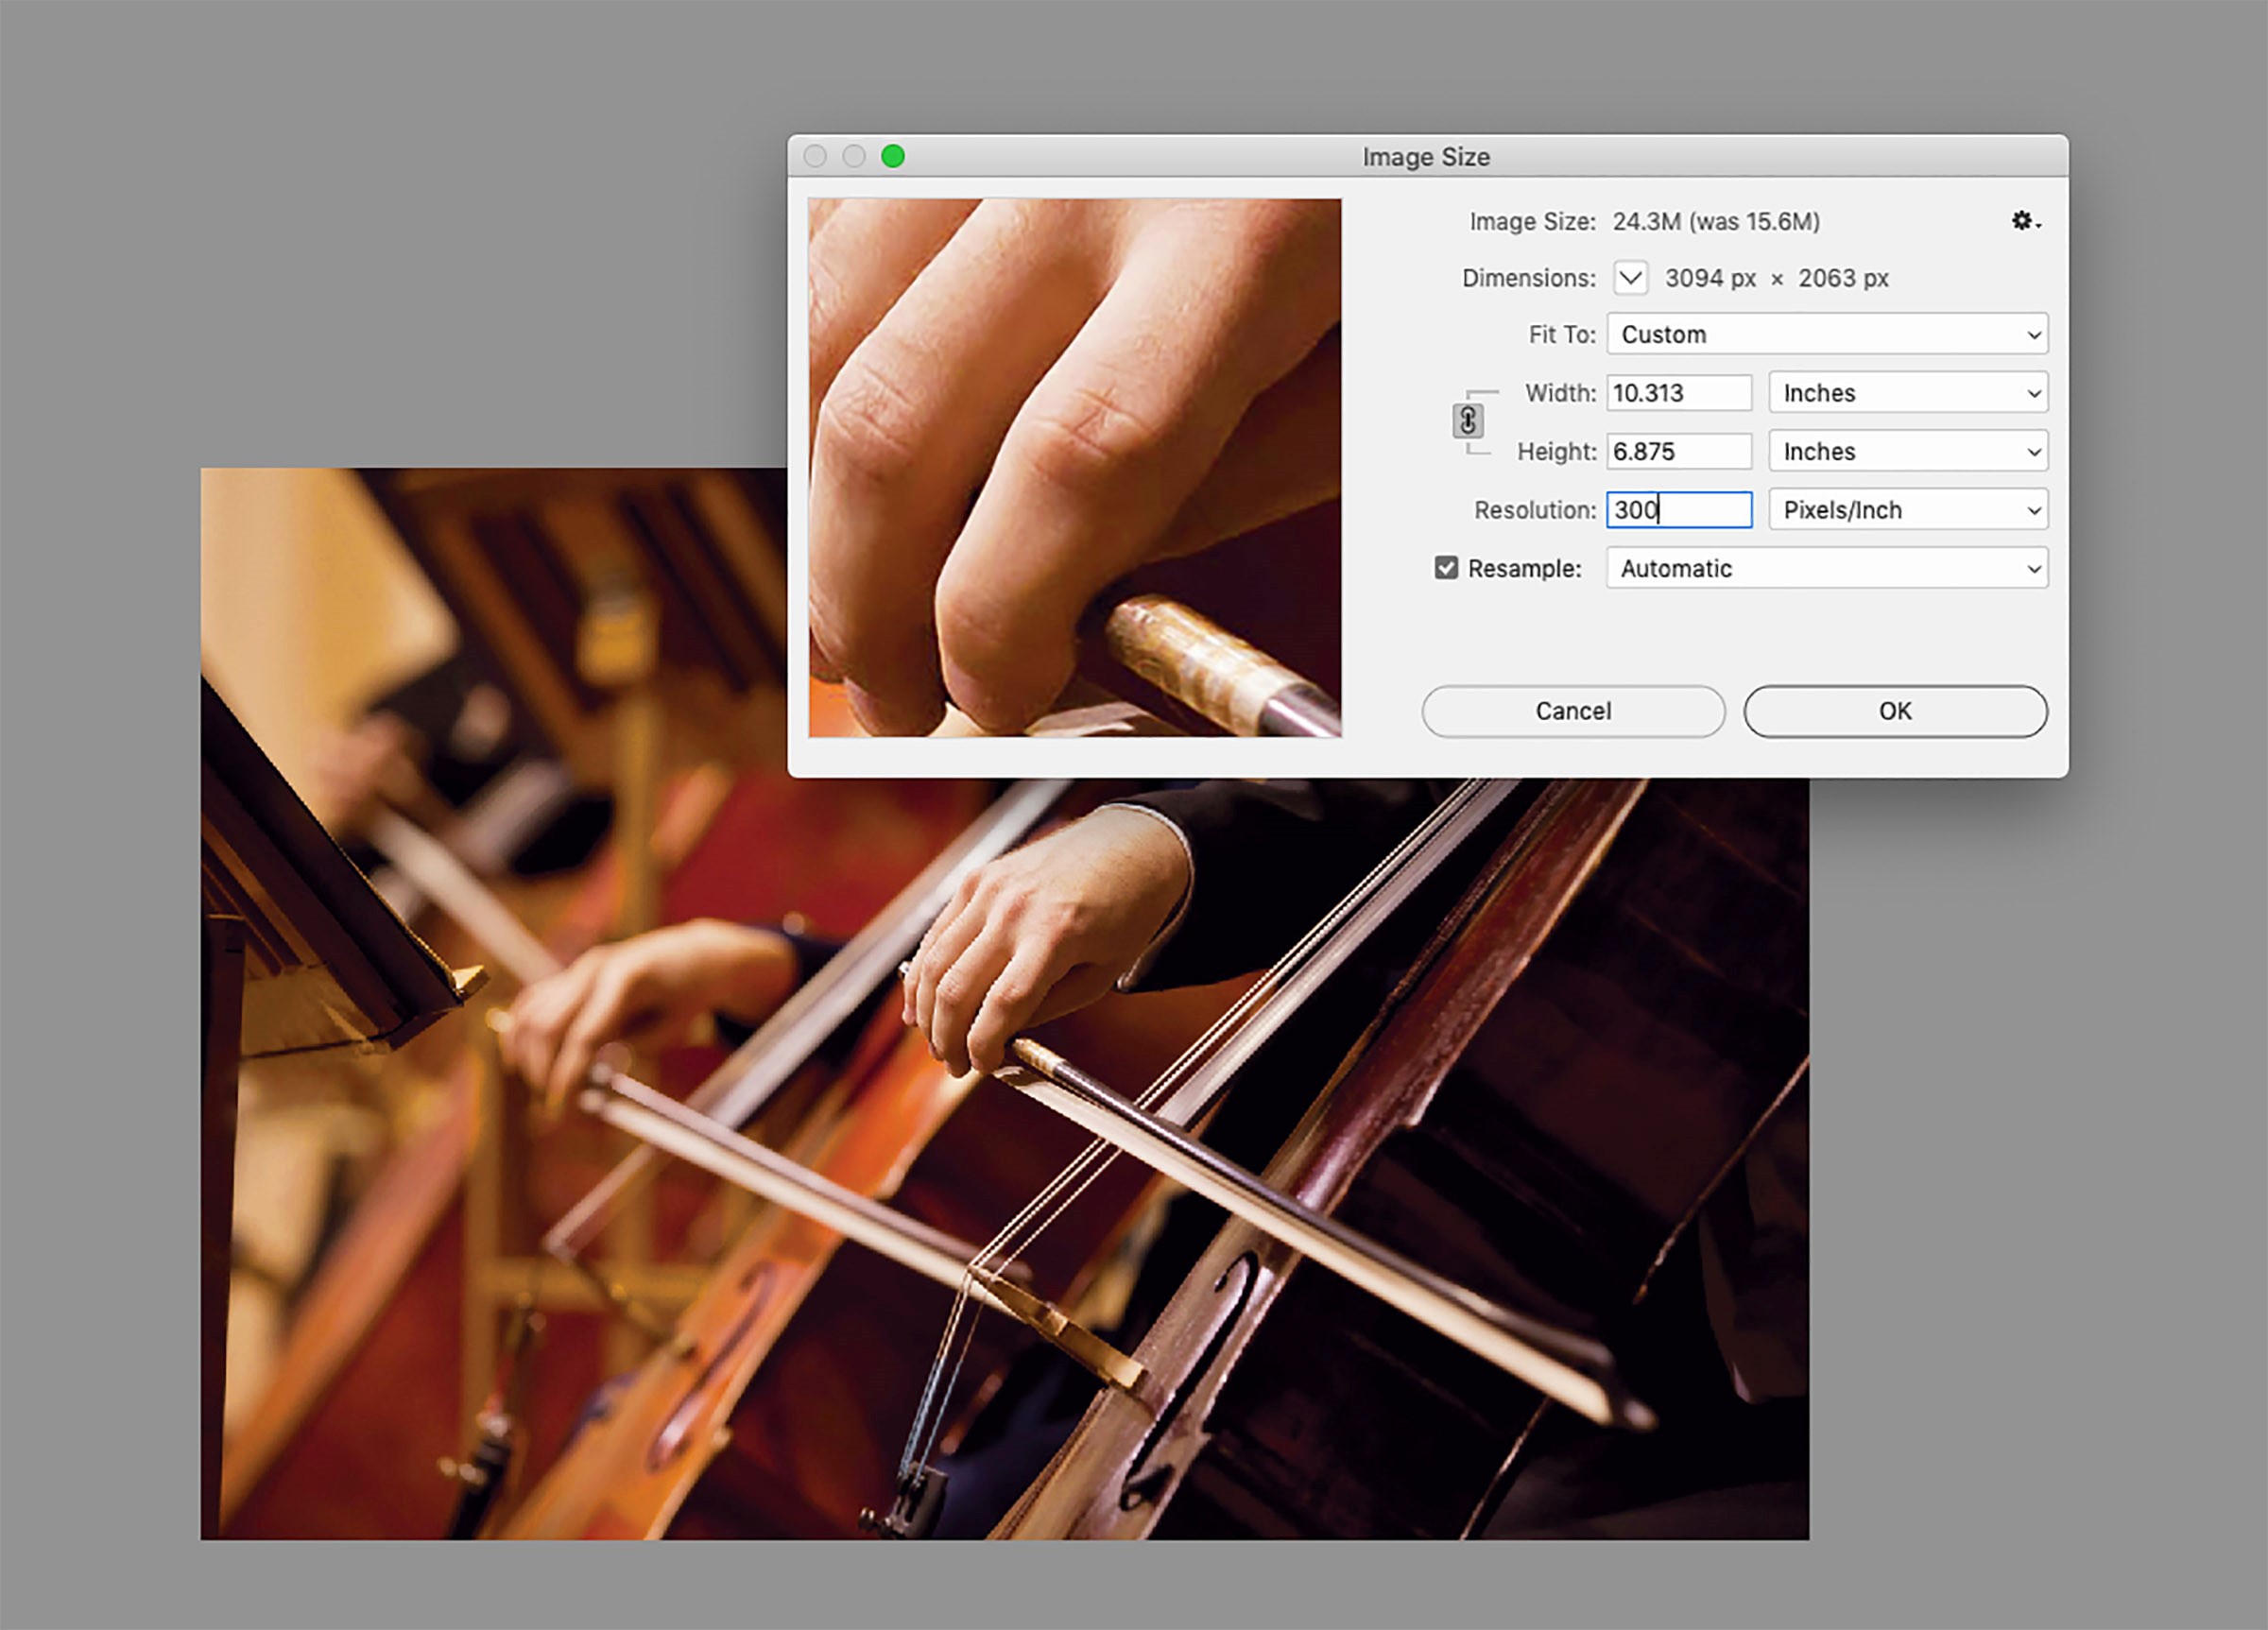
Fig. 8 |
If you want to compare your altered image with the original, open the two files and compare side by side or open the History panel in the file menu (Window > History). Click on the small thumbnail image at the top of the History panel list to view your file in its original state (Fig 9). Then click the last item in the History list. Toggle between the two to compare your images (Fig. 10). You’ll see how a slight adjustment here and there can dramatically improve an image.
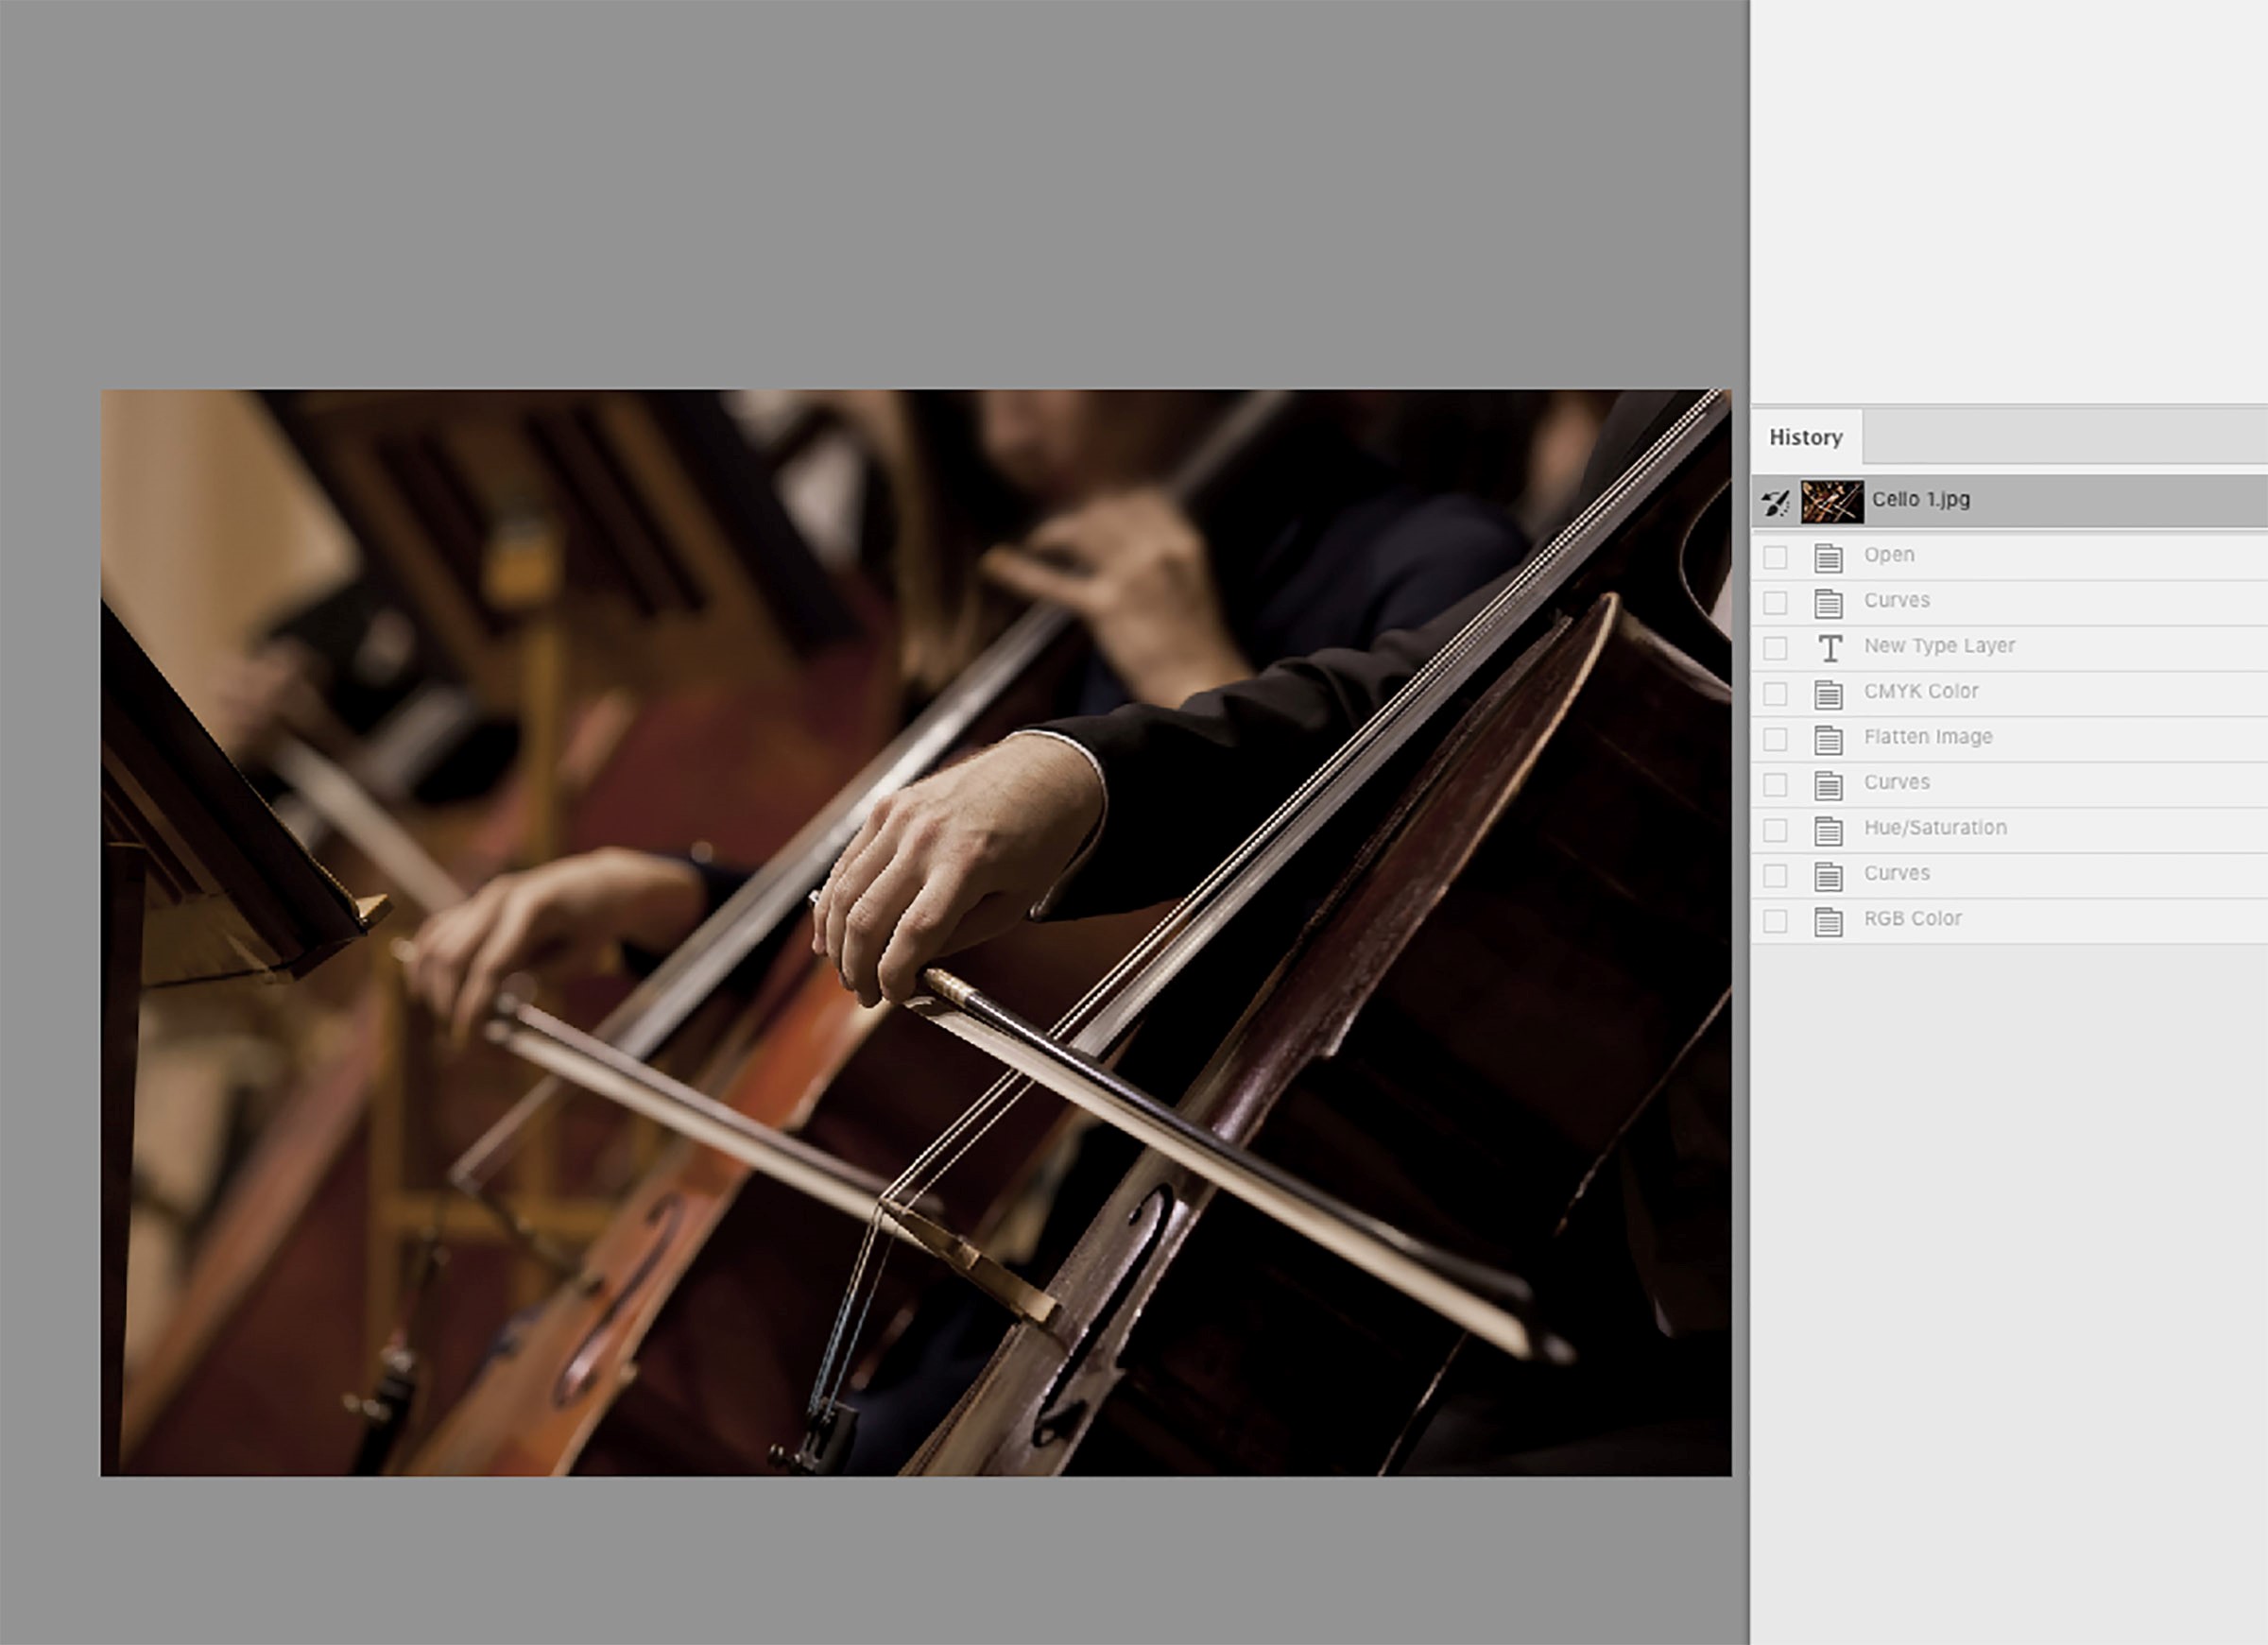
Fig. 9 |
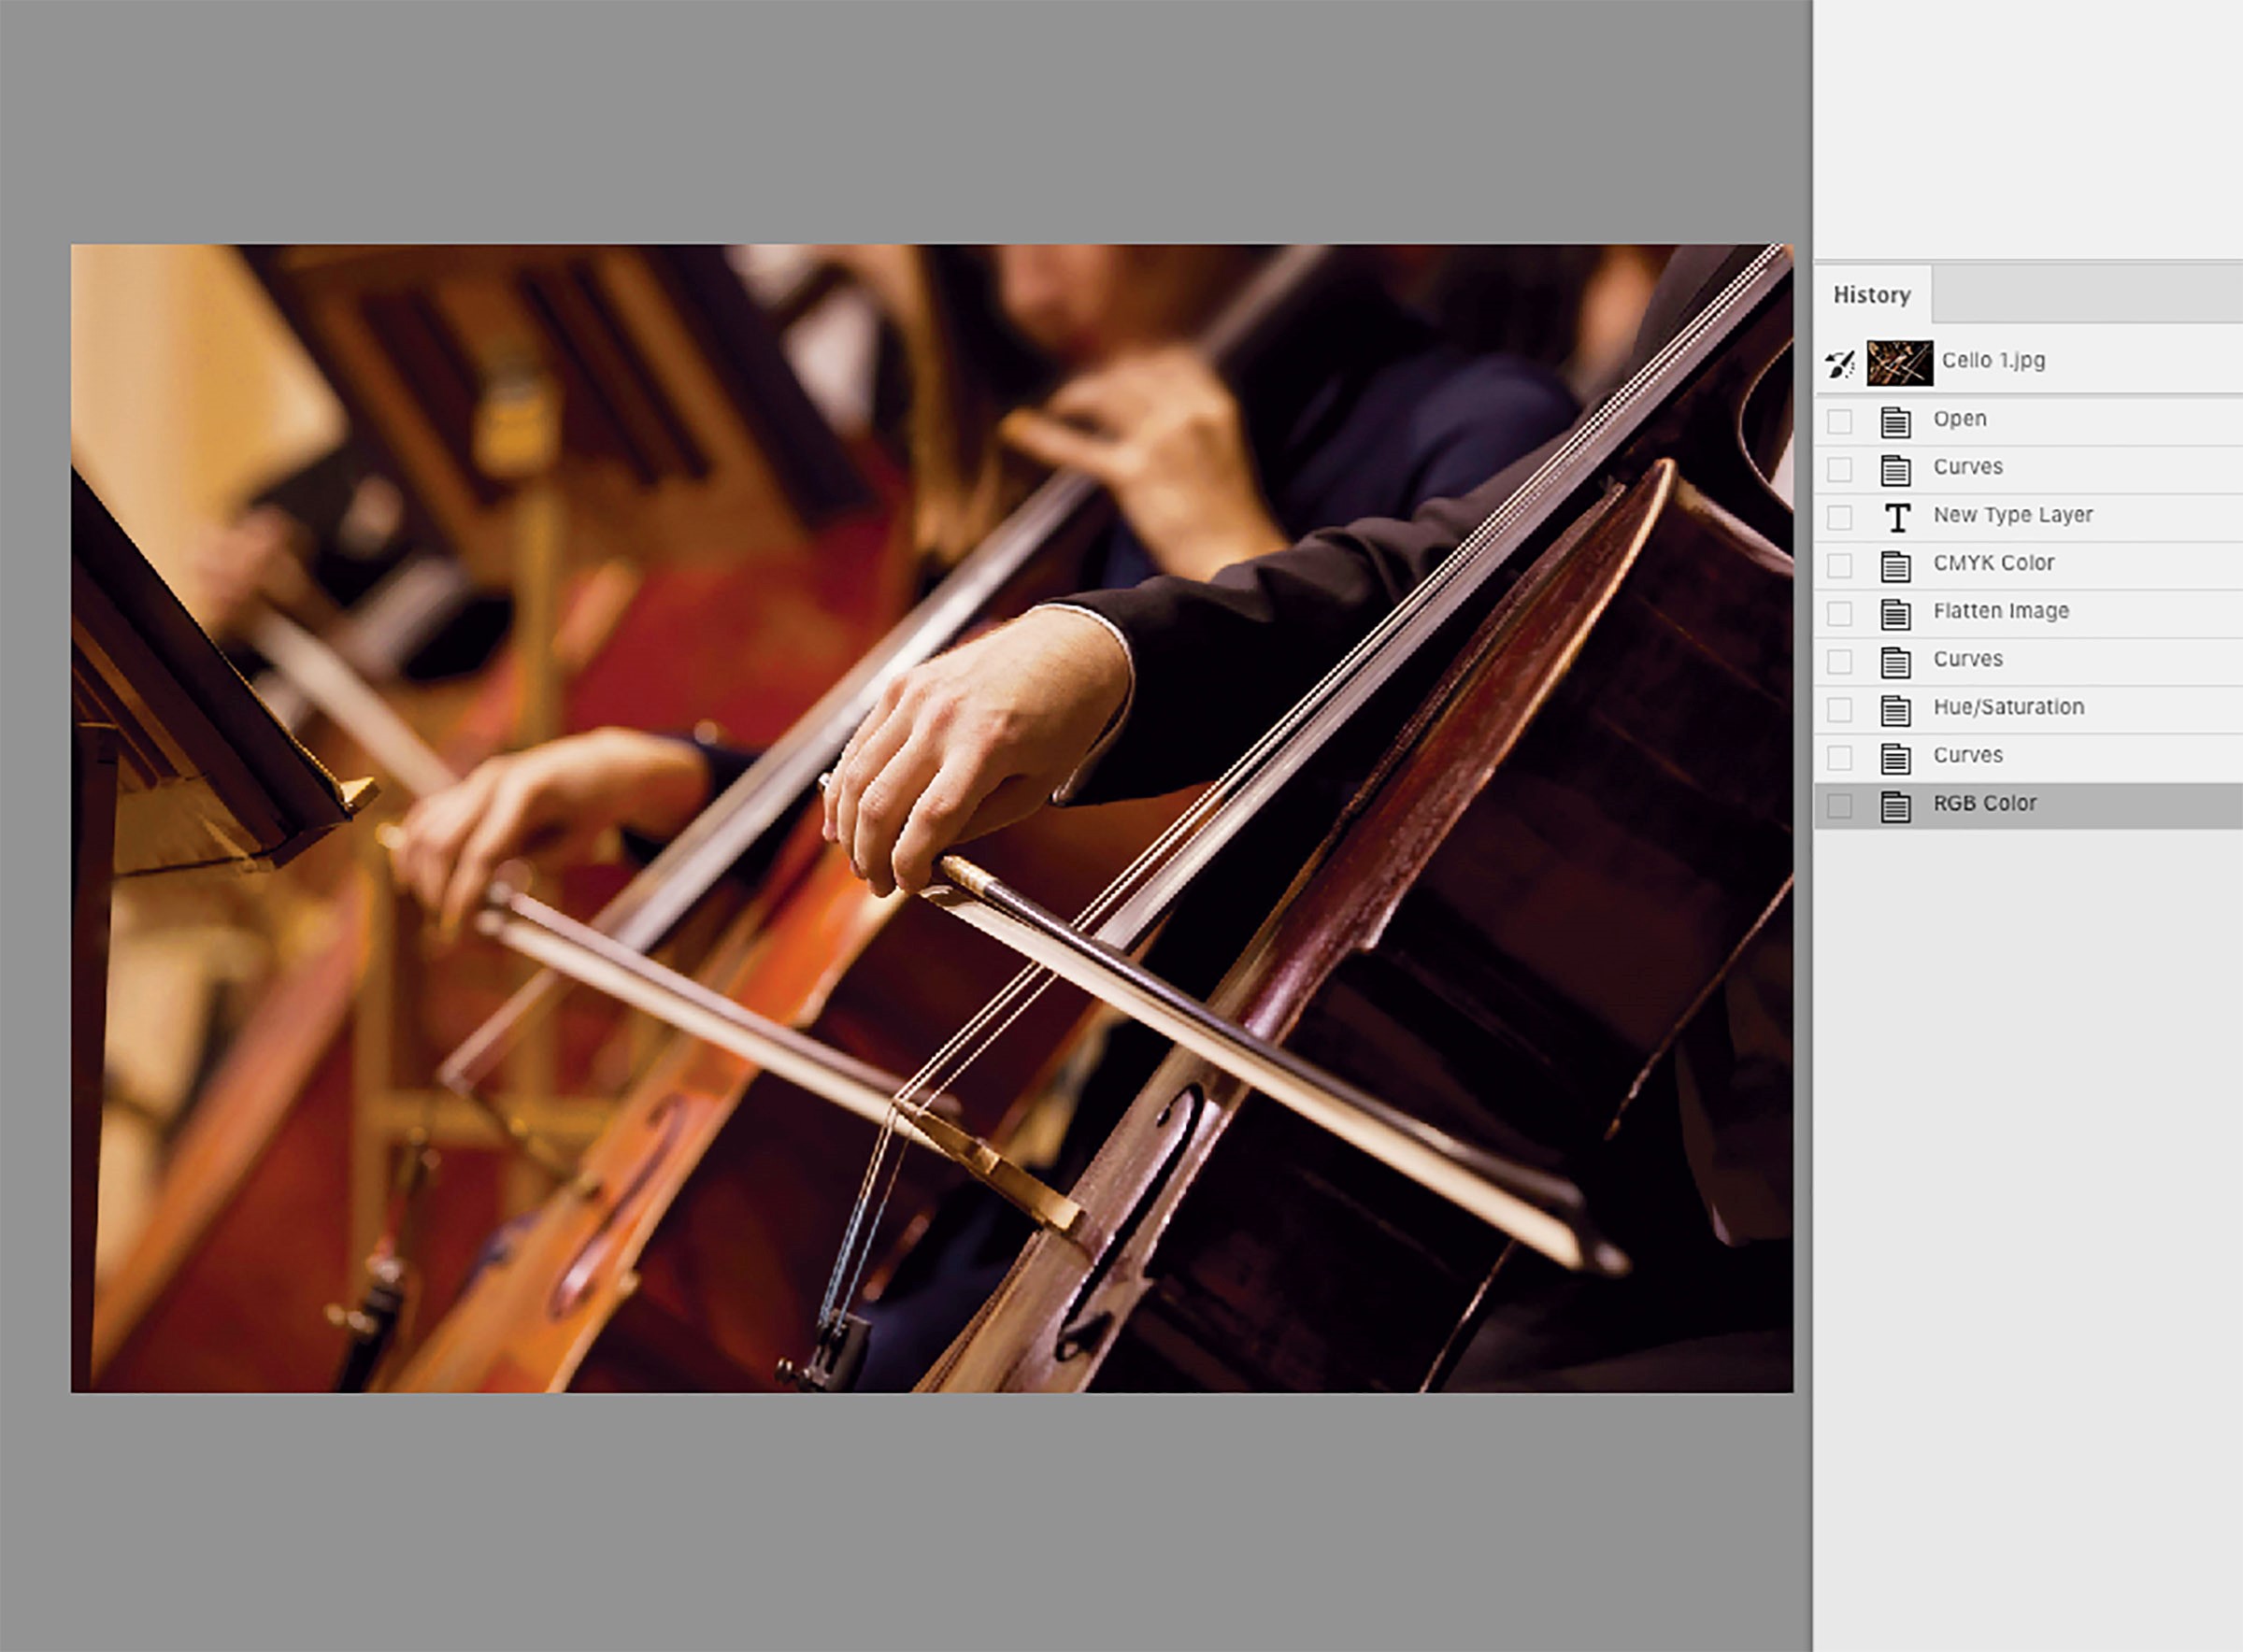
Fig. 10 |
Adobe Photoshop contains numerous in-depth editing tools and it can take years of use and practice to learn how to utilize its extensive capabilities. Simply put, this exercise is a basic way to quickly brighten up an image. Again, it doesn’t matter if you are using the application as a professional or just for fun. Photoshop is an outstanding program, which anyone can learn. There are numerous, in-depth Photoshop tutorials scattered across the web. YouTube, Lynda.com or LinkedIn Learning are superb resources as is Adobe.com. Dig into it and feel free to play around with the application. I promise, you won’t break it. We’ll touch on some other ways to utilize the Adobe Photoshop application down the road. In the mean time, happy PhotoShopping!